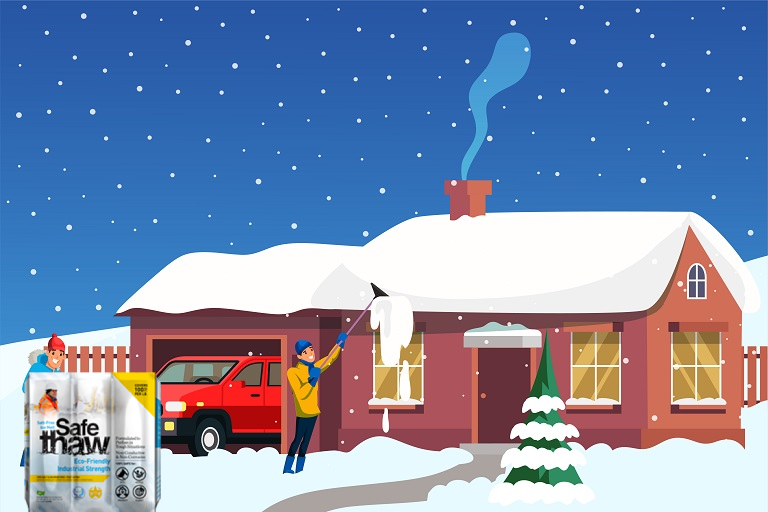
Winter does not only pose a problem for driveways but our roofs too. Most don’t know how to use roof ice melt and what kind of product will suit it the best. There are several options in the market, but only a few will help you with roof worry during winter. Paying attention to the ingredients, reading the instruction manual, etc., will help you understand how to melt ice fast on car and roof, but do we really have the time?
Keeping all these nitty-gritty in mind, Safe Thaw has developed an excellent, 100% natural, environmentally friendly ice melt product. It is a unique urea-modified product with ice-melting boosters with a liquid core. It has special surfactants and glycols and is different from any other product in the market. It can safely be used on any surface or material, and place. Whether it is driveways, pavements, patios, roofs, or even car windshields, it does not scratch the surface and is easy to clean.
Let us take a quick look at the step-by-step process of how to use ice melt on roof.

Safe Thaw
Safe Thaw was created as the ice management solution for tough winter environments. Ideal in commercial and industrial properties, shops, government agencies, bridges, and construction.
Buy NowStep 1: Clear The Roof
Clear any excessive debris, dried leaves, twigs, and cement residue from the roof so that it does not cause any blockages that could lead to seepage. Use a flat shovel and clear the roof space completely.
Step 2: Clean The Storm Drain
It would be best to clear the storm drain before using the ice melt product. Blocked storm drains will not allow the water to flow freely underground, causing far more damage than anticipated.
Step 3: Pre-Application
Use a universal ice melt product, such as Safe Thaw, which is safe on any material. Spread it with the help of safety gloves all over the roof before the first snowfall. It will avoid the snow from sticking to the roof surface.
Step 4: Shovel The Snow
After the snowfall, use a shovel to remove the excess snow from the roof. It will help avoid lumps forming on the roof and the storm drain.
Step 5: Post Application
After removing the excess snow from the rooftop, you can reapply the ice melt that is less potent, such as Safe Thaw, and remove the icy layers from the surface. While applying the ice melt on the roof, you can also learn how to apply ice melt on the car window and windshield to help you avoid any cracks.
100% Salt & Chloride-Free, Fast-Acting Ice Management Solution
Conclusion
There are several products in the market and ones that will help you remove ice safely. But if you need to learn how to use roof ice melt, all efforts to choose the right product go in vain. While keeping your home safe is good, you must remember your vehicle too. How to use ice melt on car is another important factor. The step-by-step process of how to use roof ice melt will help you this season!
Try Also Our Other Winter Safety Products
Safe Paw
The Original and #1 Selling Pet and Child Safe Ice Melt for over 20 years. Guaranteed environmentally safe – will not harm waterways and sensitive wetlands. Safe Paw can change how winter affects our planet.

Ice Traction (with Traction Magic™)
Ice Traction is your go-to winter solution for driveways, walkways, parking lots, and even black ice on the road. Unlike salt or ice melts, it delivers instant grip on snow and slippery surfaces with no wait time.
Just spread and go.
Instant Grip. Zero Melt Time.
Total Confidence on Black Ice